BACK TO
GETTING STARTED
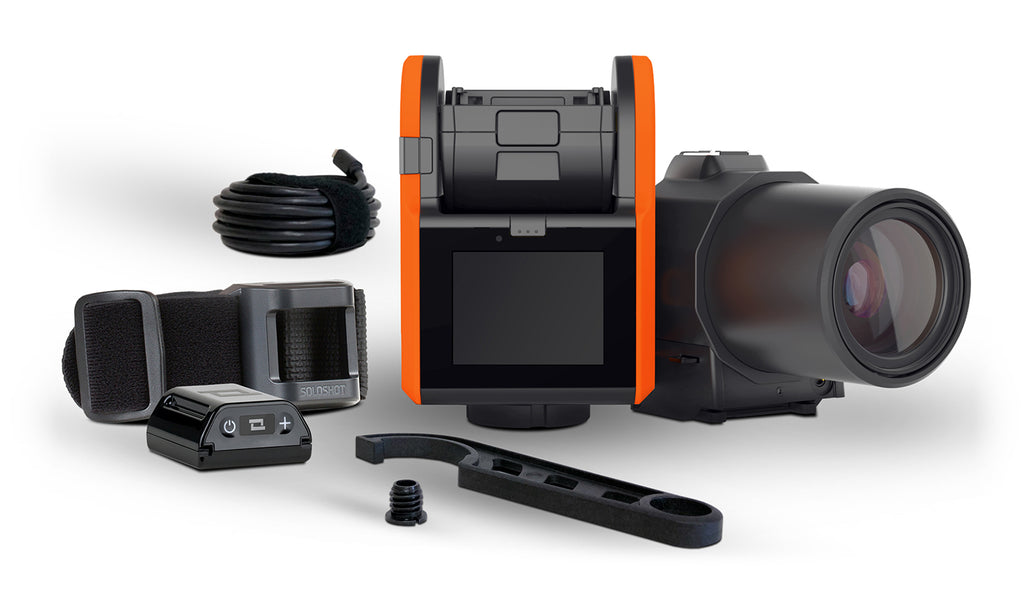
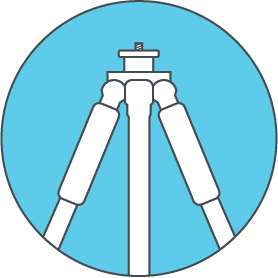
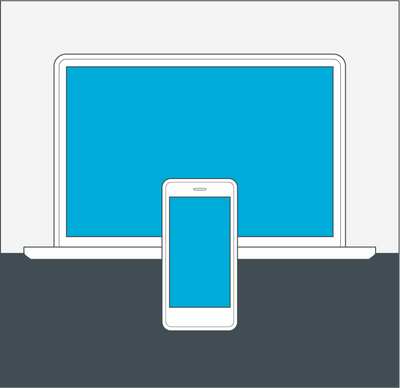
In the Box
1. Tag
2. Armband
2. Base
3. OpticX Camera (Optic65 shown)
5. Mini USB Charging Cord
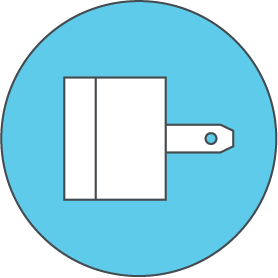
6. Tripod Adapter Screw
7. Tripod Tool
2. Armband
2. Base
3. OpticX Camera (Optic65 shown)
5. Mini USB Charging Cord
6. Tripod Adapter Screw
7. Tripod Tool
Three Things You'll Need Before Setup:
-
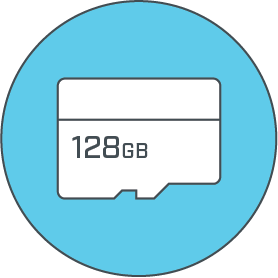
1. Approved MicroSD Card
IMPORTANT: See list of approved cards below. An adapter is necessery for off-loading content onto most computers.
VIEW LIST -
2. Tripod
-
3. USB Wall Charger
1.5 to 2.1A adapter required (most tablet chargers). The more powerful the charger, the quicker the charge.
REQUIRED
Create a SOLOSHOT account at
app.soloshot.com to create an account or download the SOLOSHOTapp from your phone's app store.
An account is required before setup of your SOLOSHOT3.
Setting Up
The Anatomy
-
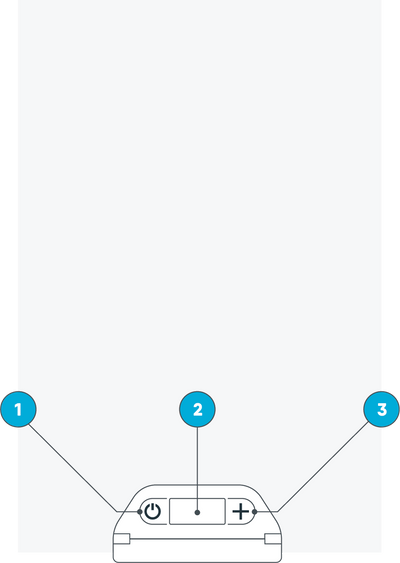
The Tag
1. Power Button
2. OLED Screen
3. Function Button -
The Base + OpticX Camera
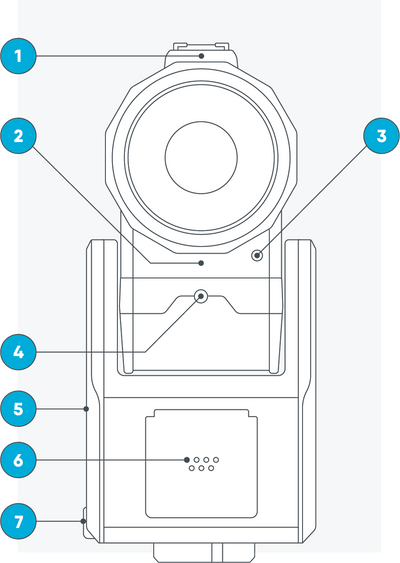
(front)1. Cold Shoe:
• Can be used to mount an external mic and will accommodate future SOLOSHOT accessories.
2. Mono Mic:
• Audio Compression: AAC 48KHz (128Kbit/s)
3. 3.5 mm Auxiliary Jack:
• Supports External Mic (Analog, Stereo) and Remote Wireless Mic (sold separately)
4. Indicator LED
5. K-Lock Slot:
• For use with K-Lock to deter theft (sold separately)
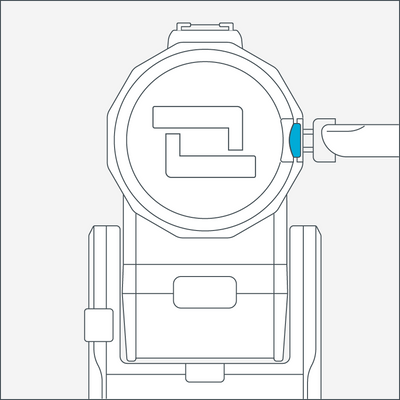
6. Tag Charging Port
7. Mini USB Charging Port + USB Type A Port -

The Base + OpticX Camera
(back)8. HDMI Out:
• Provides output and Video Playback for TVs and Monitors. Micro HDMI cable is required.
9. Micro SD Card Slot
10. Camera Release Button
11. Power Button
12. Touchscreen
13. 3/8” Tripod Mounting Head


Device Assembly
-
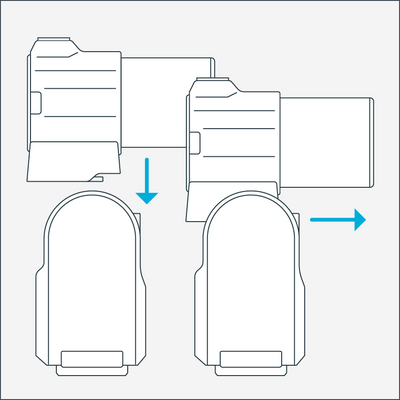

Docking the Camera
Dock the OpticX Camera to the Base by guiding it down onto the tilt drum from above, and then pushing it forward until it securely clicks into place. -
Inserting the Micro SD Card
Insert an approved Micro SD Card (not included) into the side of the OpticX Camera. You will hear a click when fully inserted.
IMPORTANT: Your SD card will be completely erased when formatted. Make sure to save any content that you don’t want erased! -
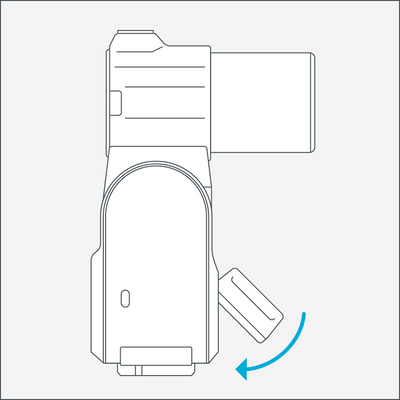
Docking the Tag
Dock the Tag, with buttons facing up, into the Accessory/Charging Port on the front of the Base.
Attach the Tag to the Base by first inserting from the top, as depicted in the graphic above. -
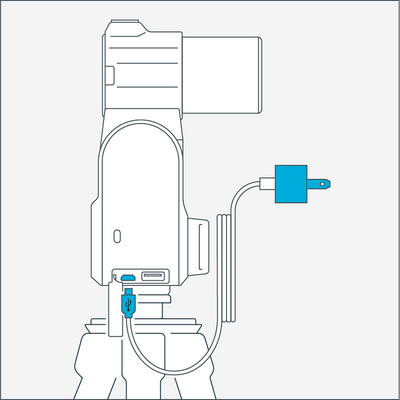
Charging Cord & Adapter
Dock the Tag to the charging port in order to charge the entire unit at once.
Insert the Mini USB Charging Cord into a USB outlet adapter (not included) and plug it into the Base. 1.5A to 2.1A outlet adapter is required. (most tablet charger adapters)
IMPORTANT: For best results, we recommend charging the battery to a full charge before beginning the set-up process.


Attaching the Tripod
-
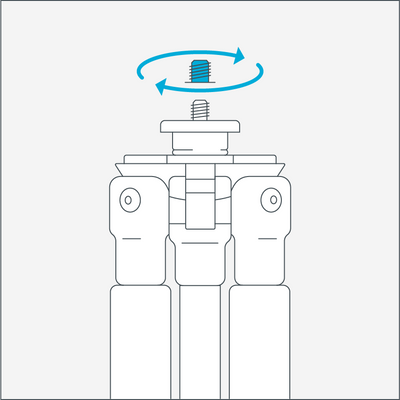
Tripod Adapter Screw
For the best results, we recommend mounting the Base on a Tripod with a 3/8” mounting screw.
If you already have a pan/tilt head on your tripod, please remove it prior to connecting your Base.
If your tripod only has a ¼” screw, use the provided Tripod Adapter Screw and connect as shown above. -
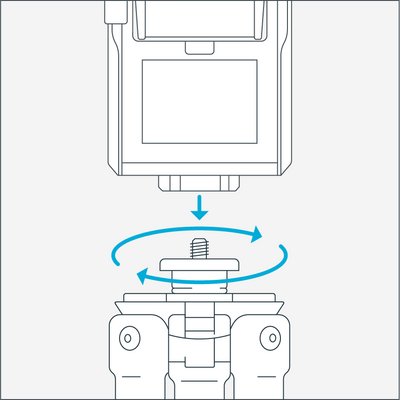
Connect the Tripod
Hand tighten the Base onto your tripod until you feel light resistance from the panning motor.
IMPORTANT: For the best experience, use a sturdy tripod. -
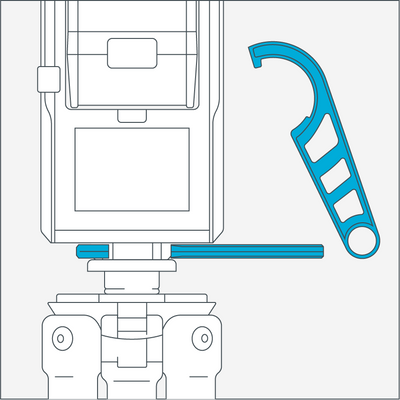
Using the Tripod Tool
Use the provided Tripod Tool to finish tightening and un-tightening for removal.
IMPORTANT:Avoid excessive manual panning and tilting of the Base motors by hand.


Updating & Registration
-
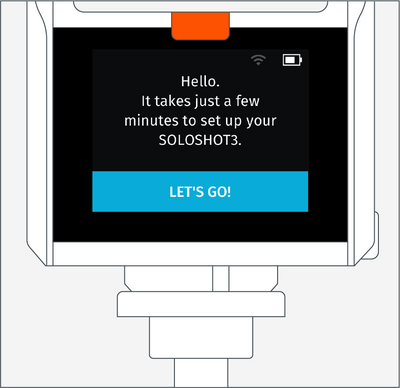
Updating Software
Power on the Base by pressing the power button (highlighted in orange above) and follow the on-screen instructions to update your device.
IMPORTANT: Your SOLOSHOT3 must be upright and level upon start-up and updating software. It’s recommend it be connected to a tripod during this process.
IMPORTANT: The screen will be blank for up to one minute during certain steps of the update process. Do not power down device during update. -
Create an Account
If you haven't already done so, create a SOLOSHOT account at app.soloshot.com or download the app from your phones app store.
IMPORTANT: A SOLOSHOT account is required before setup of your SOLOSHOT3. -

Registration
You'll be prompted to update and register your Base, Tag(s) (See Below) and Camera in the following order.
1. Update the Base
2. Register the Base to your Account
3. Update the Tag
4. Register the Tag to your Account
5. Format SD Card
6. Update the Camera
7. Finished -
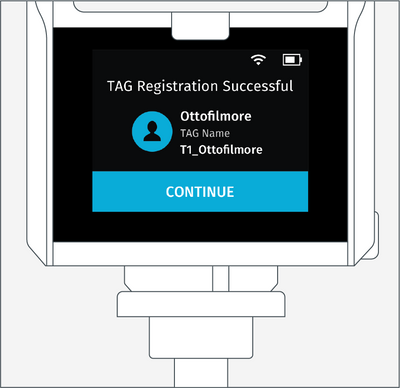
Tag Registration
After registering your Tags, you are prompted to select the tracking preferences of the Tag. -
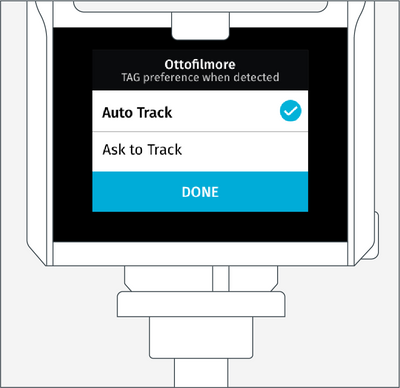
Tag Preference:
Auto Track
When the Tag is turned on and within range of the Base, the Base will automatically track this Tag.
This is the default setting. -
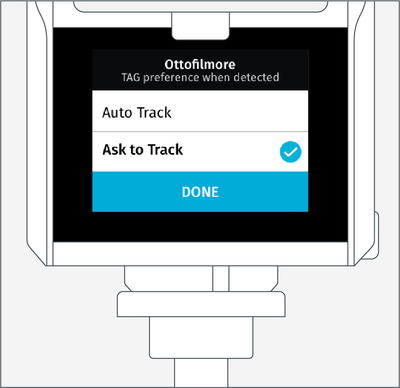
Tag Preference:
Ask to Track
When the Tag is turned on and within range of the Base, the Tag will need to be toggled on within the Tag Manager.
Tags that are toggled off will not be tracked by the Base.